Showing posts with label Christmas. Show all posts

Monday, September 8, 2014

Sponging Like Nobody's Business


I am currently on a sponging binge.  I can't help it.  I love it I love it I love it.  This card is nowhere near what I had in mind when I started, but sometimes when you take a path you didn't know existed, you end up with something awesome.  Other times you end up in the woods with a bear chasing after you, but not this time!


The colours seem a little weird on my screen, but they're Blackberry Bliss, Pacific Point, and Island Indigo.  I started out by sponging the whole 4 1/4 X 5 1/2 sheet and then didn't want to cut it it was so pretty.  The tree is from Festival of Trees, as is the sentiment.  I've been wanting to make a shaped shaker frame for quite some time and this weekend I FINALLY picked up some mounting foam tape, as well as a gigantic jar of glitter (it's something ridiculous like 24oz).  It's just a clear glitter rather than shiny, which is perfect for making it look like a snowdrift!

I already have another card in mind that will incorporate both of these techniques, as well as some trees, so stay tuned!

Thursday, August 28, 2014

Snowy Backdrop


You know that feeling when you see a card you love but you don't have the supplies to make it?  Well, if you live in the city, no problem.  However, if you're a little country bird like myself, you make do with what you've got on hand.

I saw an amazing background that looked like a galaxy with all sorts of cool stuff that I don't have (embossing paste, Perfect Pearls, star stencils...).  I was determined to make a snowy background in the same fashion, so I set out rummaging through my stuff to see what I could find.

I sponged the background with Coastal Cabana and Lost Lagoon and was pretty happy with that as a base.  To get the snow, I used some pearly metallic acrylic paint I had on hand and mixed it with rubbing alcohol.  This made it nice and runny so I was able to pick it up with a paint brush. I then flicked my brush towards the page to get the misty look but the blobs weren't big enough for what I wanted so I just used the tip of the brush to add a few bigger dots on.  Turned out pretty well!


 After that dried I used some Staz On to stamp my image (and extended the trunks a little with a marker) from the new set Festival of Trees.  I usually centre everything on my cards but wanted to try something new this time and I'm really happy with the result.  The embossing folder is an old one but I just couldn't get rid of it.  Since there isn't a whole lot of the mat showing I wanted something on a small scale and this one was perfect.  Petals a Plenty would have worked as well, but I wanted to keep the snowflake theme going.


And what would a Christmas card be without a little ribbon?  This is the Lost Lagoon ribbon you can find in the Holiday Catalogue.  I layered a piece of white satin behind it so the ribbon stood out more than it would have on the monochromatic background.  Overall, I'm loving this card.  It could grace the homes of quite a few family members this December!

Thursday, August 14, 2014

Nutty or Nice? (Freshly Made Sketches 149)


Things I should be doing this morning:
  1.  Mowing the lawn
  2.  Folding laundry
  3.  Vacuuming/mopping all floors
  4.  Changing bedsheets
  5.  Going for a run

Things I'm not doing this morning:
  See above list


Not everyday can be productive, am I right?  Of course I am.  So rather than submit myself to the shackles of slavery that are housekeeping, I am in my craftroom.  I meant to have a bunch of posts lined up before I went on a holiday, but it didn't happen.  Anyways, here I am again with Freshly Made Sketches to start my day off right.


I know.  This guy is hilarious.  He's the Tom Selleck of nutcrackers.  I originally had the card without the glitter, but I figured Tom was feelin' the need for a little glitz so I grabbed my spray glue and sparkled him up a little.  The inside of the card (which I was too lazy to take a picture of) says, "nutty or nice?"  It sooooo appealed to my super corny side that I needed to have this set immediately.  For the rest of you, you can order it come September.

Tuesday, November 27, 2012

Watercolour Winter


I love vintage stuff and this set just screams out to be used for that purpose.  Instead of just stamping the berries and leaves, I decided to heat emboss with gold and then use my blender pens to fill in the details.  I started with the leaves (Always Artichoke) and then did the berries (Cherry Cobbler).  I loved the look of the leaves, but found that the berries looked too pink so I decided to use the actual CC marker for that bit.  Much better.  The great thing about colouring over heat embossing is the unlikely possibility that you'll go outside the lines!


This is another of the cards we'll be making at the buffet.  Live locally and want a spot?  Drop me an email.  I've got 3 spots left.

Monday, November 26, 2012

Fa la la la... Oh wait, it's still November.


Oh goodness.  It seems that the only motivation I can find today is for making cards!  And CHRISTMAS cards at that!  I love Christmas, however, I've been feeling a little cranky towards all those people that have had Christmas decorations up for the past few weeks.  I feel like it's fair to start on December 1st, but before then is a little much for me.

Even though I don't want my decorations out yet, I'm trying to get all of my cards done by next weekend so I can mail them out.  I hate scrambling on like December 20th to get them all addressed and in the mail.  Not that I would ever do it that late but....


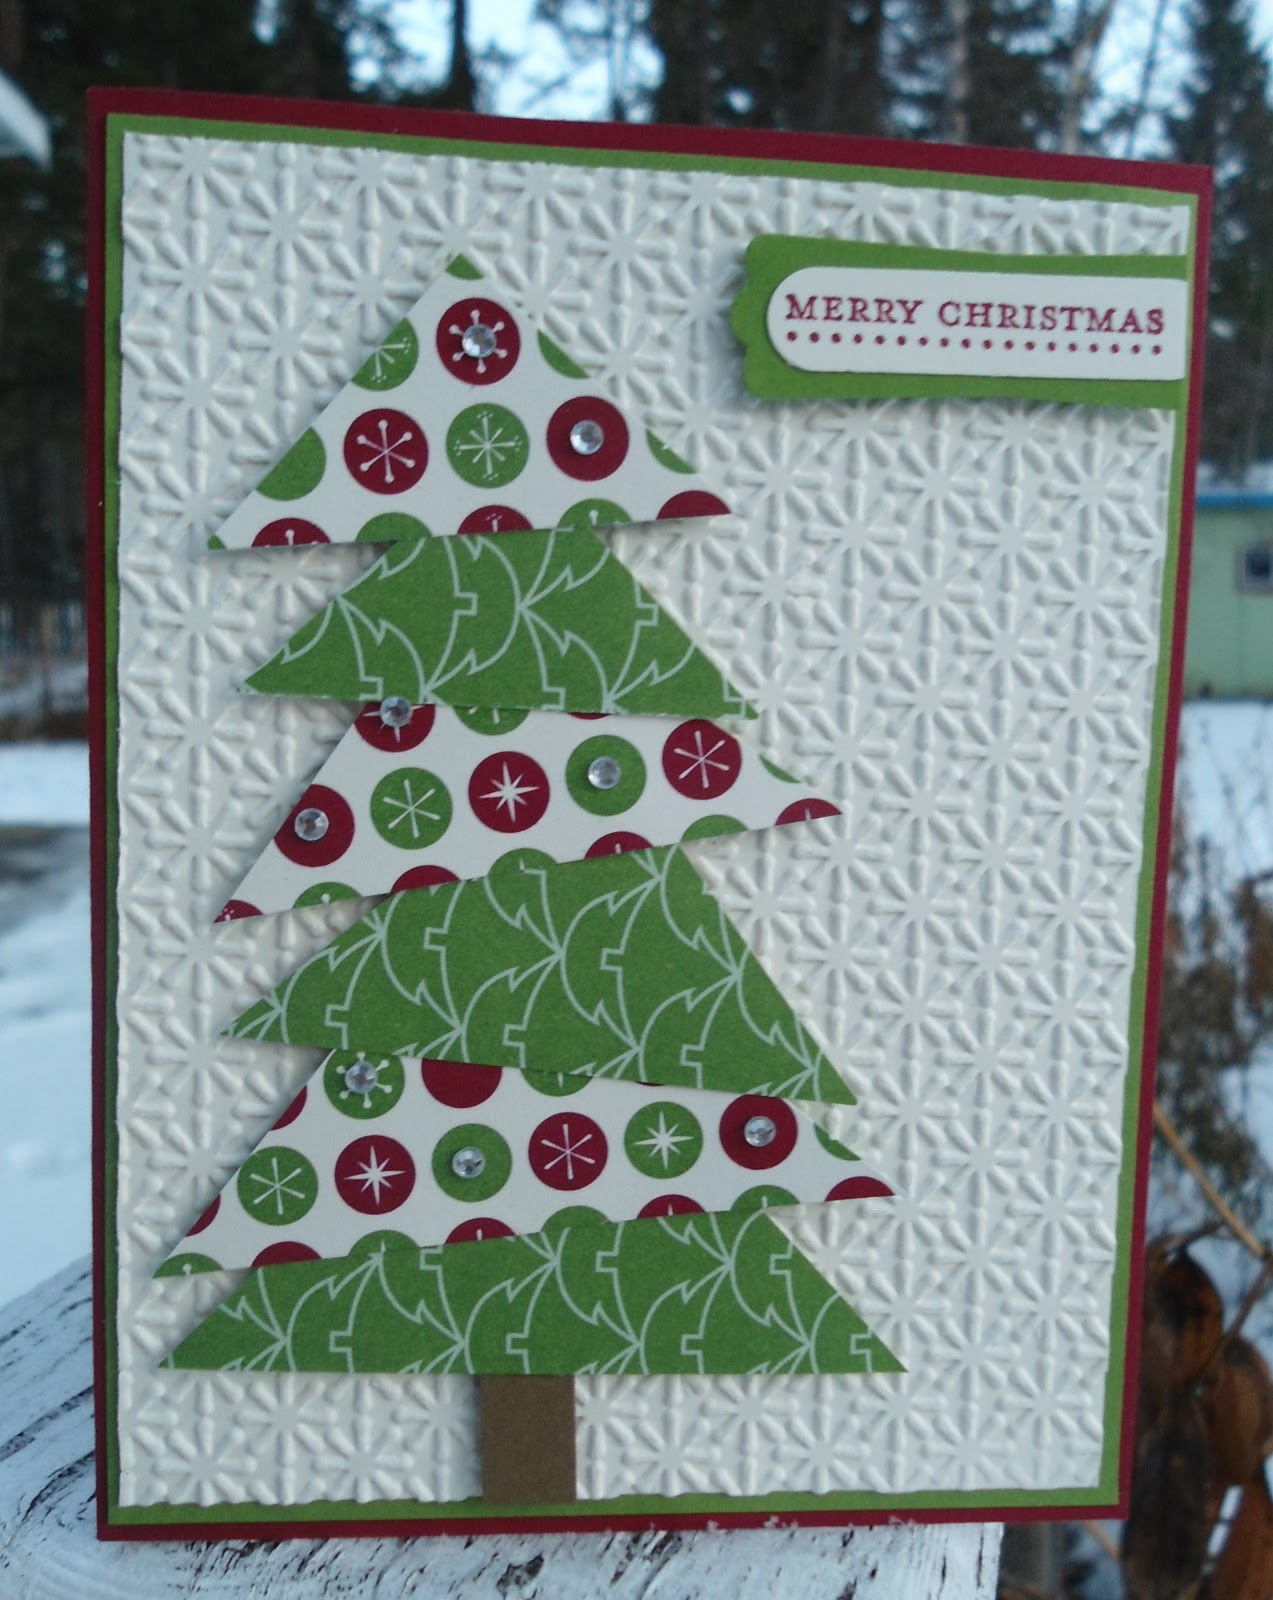
So in my card craze this afternoon I remembered that I had a few packages of this lovely paper (Be of Good Cheer) kicking around.  LOVE Gumball Green and Cherry Cobbler.  Love love love it.  L.O.V.E. kind of love.  You get the picture.

I don't really have any of the "fun" Christmas sets but I wanted a few "fun" cards so I tried this little idea out.  Not too bad!


So when I went outside to take this picture in the failing light (it's only 4:12pm right now, how sad is that?) my little sidekick, Lily, came along to help.  What you can't see are the remains of a stuffed giraffe at her feet.  It's a little grotesque, but she really likes the remaining two front legs of that poor little baby.  I've seen the head around the yard, but not the body, nor the back legs.  I should throw it away, but I'm far too amused by it to do such a thing.


Sunday, November 25, 2012

Sunday Stamps 25


This is one of my ultimate favourite colour combos so imagine my surprise when I saw it on a challenge!  The Sunday Stamps blog is one I look at now and then, but I haven't created a card based on its challenges yet (I don't think).  Anywho, since they have my fave combo up I thought I better play along!

 This set is from last year's mini and I almost cried when they didn't continue it!  I think the little socks are sooo cute, and there's a matching punch too.  I just couldn't think of parting with it andI'm glad I didn't.  I think this card will also make an appearance in my buffet.


I love this non-traditional colour scheme for Christmas.  You can never ever go wrong with Crumb Cake, and the juxtaposition of the bright red against the gentle blue is striking.  Thanks for the challenge ladies!

1 Month 'Til...


I love Sundays.  I especially love Sundays that include drinking lots of coffee and crafting.  This was a super quick little card to put together (once I figured out what I wanted).  I think it might even fit in the skinny post office slot (no extra postage - yay!).


I'm doing a card buffet next weekend so I wanted to balance the more time consuming cards with a couple of quickies and this one fits the bill.  The set is old, but still cute!


Thursday, November 22, 2012

Lovely As a Tree


Sorry for the bad picture.  It's only 4:25 and it's dark outside already.  I could wait until tomorrow to retake the picture, but I'm lazy, and I don't want to. :)

I love this set.  It's the oldest set in the catalogue and I never tire of it.  I also don't seem to be tiring of masking and sponging.  You can make so many variations using this technique, and it doesn't require a bunch of tools to do.

I started my sponging with Night of Navy, but it was just too dark so I switched to Midnight Muse.  Much better.  For the snowbanks and I didn't ink my sponge again, I just went with whatever was left over from the sky.  It's super light, but enough to add some definition.


I knew I needed a little something extra since this is a pretty simple card so I used some Iridescent Ice to glitz up the sentiment.  Perfect!  And because it's so skinny, I can mail it with a regular stamp.  Bonus!  As we get nearer to mailing Christmas cards, that's important to consider.  Postage jumps from $0.61 to $1.29.  Not so bad?  Try mailing 30 cards like that. $18 turns into $38 pretty quick.

Thursday, November 15, 2012

Hand Stamped Sentiments #144


Ok, so it's been two full months a while since I last posted.  Life gets in the way sometimes, non?  (Say that line in a French accent - much more effective.)  My darling friend Sandra was so kind as to bring this to my attention this week whilst crafting, so I decided I better get on it.  Plus, I have a week off work so I think I'll try and cram a ton of blogging in to shut her up make her happy.

Anywho, over at Hand Stamped Sentiments this week they've got a challenge for snowflakes.  I recently got this set (Snowflake Soiree) and decided it was time to play. 


This summer I went on a bit of a bender collage stamping and used that technique here as well.  In the background you can see En Francais (best stamp ever).  I stamped it in Bashful Blue and then off once so you can just barely see it.  Then along the bottom I stamped the image from the Snowflake Party wheel (I hate wheel stamps, but once you pull them off the wheel and add some cling mount foam, voila!  Magic!)

Though the collage factor of this card takes a little time, the lack of a bunch of layers makes it pretty quick to assemble, and since the sentiment is the only additional layer, it can be mailed with a plain old regular stamp.  No surprises at the post office.

That's that!  Back to stamping and blogging like crazy to appease my crazy friend. :)  Love ya CFAL!


Thursday, July 12, 2012

Freshly Made Sketches #43 - Be of Good Cheer

It's about 35 degrees outside (95 degrees to you ladies south of the border).  I love the sun and heat, but after baking outside in it for a few hours, a girl needs a break.  Where to I go to take a break?  My craft room - of course.


This week, Tui over at Freshly Made Sketches came up with a great little sketch for us.  The two panels make for a nice DSP display, and I've been stocking up on Christmas cards so I grabbed my Be of Good Cheer paper and away I went.


I love to mix up non-traditional colours for Christmas cards, but sometimes I really love good ol' red & green.  I'm not in love with the way Garden Green and Wild Wasabi look with any of our reds, and I got a little sick of always pairing Cherry Cobbler with Old Olive, so the addition of Gumball Green this year really made me happy. It's a fantastic green green.  Like grass green.  It's the green I think of when I think of Christmas.  As I dug through my Christmas stamps I almost cried when I realized that all but three of my sets are no longer available.  Delightful Decorations however is still going strong.  I love dimension on a card, but hate cutting things out, so punches are my friend.  I've gotten a lot of use out of this set, and think I'm going to use this card at an upcoming workshop.

Now for something completely unrelated to stamping, but that I feel the need to share.


When it's hot out, I want a cold drink.  The other day the heat was blazing and it was practically the Kalahari in my backyard.  I'm taking the kind of heat that you can see coming off the road in little waves.  The kind that makes your eyes turn into little swirlies.  I wanted something ice cold and tasty.  Problem there is that I wanted something tasty.  Not water, something with flavour.  The problem there is that I'm trying to cut back on my sugar intake.  Since I had two massive coffees in the morning with some flavoured cream, I couldn't justify drinking iced tea (the bad kind, made from crystals).  I wanted a Passion tea Lemonade.  The problem there, is that the closest Starbucks is a little more than an hour's drive along the highway.  So in my quest for a Passion tea Lemonade I drove into town and got some supplies to make my own.

Imagine my dismay when I got to the grocery only to realize that Tazo teas are $7!  What the heck!  Are you kidding me?  [And for starters, fruity "tea" isn't really tea at all.  It's masquerading as such, but I know better.]  There's no way I was spending $7 on something that I was almost embarrassed to buy, so I headed over to the Western Family selections (basically our grocer's no-name brand).  There I found Cranberry Raspberry, for $2.49.  Much better.  I dropped it in my cart and headed to the coolers.  When buying Lemonade, get the good stuff.  Simply Lemonade.  It's a complete rip off at $5.50 for under 2L, but it's delicious.   I added that to my cart and off I went.  (I realize that I could just post the recipe on here, but how boring would that be?  Plus, you can scroll down if you get bored of my rant.)

So here's what I did to make my very own just-as-delicious-but-homemade-so-better Passion tea Lemonade (okay, it's Cranberry Raspberry Lemonade, but tastes exactly the same).  First, separate your lemonade into thirds.  Keep one third in the bottle and store the rest for later (or make a huge batch if you have a big container).  Boil 1L of water and steep 7 "tea" bags in it for about 5 minutes.  Remove the tea bags and stir in about a tablespoon of sugar (I did this in a mason jar).  Then, wait for it to cool and mix it with the lemonade.  (To speed up the cooling process because I'm impatient, I poured it into a large baking pan and threw the lemonade container in the freezer.  It was ready to drink in about 20 minutes.)  The "tea" really cuts down on the sugar level of the lemonade, and gives it just the right amount of refreshingness (that's not a word, but bite me if you care).  I got three batches out of my one box of "tea" and container of lemonade. 

Now, I'm not one to always be looking for ways to save money, but it ended up costing me less than $8 for about 5L of tea.  I'm thinking each batch is about the equivalent of 10 ventis, so it seems like a pretty good deal to me.

Maybe tomorrow I'll make a batch of black tea lemonade and see how that goes.

Monday, July 2, 2012

Merry Monday


Yesterday I set myself a goal of creating five Christmas cards and I succeeded.  It was quite a stint in the craft room, but I'm glad I did it.  With the help of Merry Monday it was actually quite easy to get them all together.

This morning I checked out Always Playing With Paper to see the new sketch but she's taking a break this month and the challenge is to use any old sketch.  Well, I just happened to have done that already!


In an effort to clean out my paper stash a bit I've been going through my giant stack of retired DSPs and I have quite a bit of this one left.  Winter Post is also retired (much to my extreme disappointment), but I have enough of it left for an upcoming Christmas card workshop.  If you live in my area, the workshop will be held in my craft room on Tuesday, June 10th, at 7:00pm.  Drop me an email to register.

On a completely unrelated note, my craft room is a separate room in our garage.  Right now my husband is cleaning up the garage and listening to gangster rap.  Not what usually fills the air when I'm out here crafting.  I think he's pretending he's 19 again.

Sunday, July 1, 2012

Paper Players #102


Christmas in July?  Sure is!  July 1st is Canada Day, so I was feeling patriotic when choosing the colours for this card.  No, our flag doesn't have anything Crumb Cake coloured, but the red and white are close enough.  I got a start on some holiday cards yesterday, so I'll continue that theme today.  Imagine my delight when I saw that the Paper Players had a Christmas theme challenge today!


I live this little ornament set (Delightful Decorations) and the swirls just begged to be paired with the Elegant Lines embossing folder.  A little scallop dots ribbon turned over and voila!  This was a really quick card to make and I'm thinking it would be a good one for mass production.

Now back to crafting.  My goal is to make 5 different Christmas cards before I take a break.  I could be here for a while....

Sunday, December 4, 2011

A La Card Monkey Sketch


As I sat looking out into my backyard this morning sipping a cup of Christmas Blend (and a touch of Hazelnut syrup), I thought about how much I love winter in the Cariboo.  I don't love that it lasts until April, but winter here, cold as it may be, is still sunny.  There are only a few inches of snow in the yard right now, and it's definitely chilly, but the sun is shining as brightly as it does on any day in July.  The smell of wood stoves is drifting through the neighbourhood, and I'm getting set to haul out the ornaments and put the tree up.

I wanted to make another Christmas card (my list seems to be getting longer each time I look at it) but wasn't feeling terribly inspired.  I headed over to the Card Monkey blog and used it to get the juices flowing.  I don't love Riding Hood Red, so I felt like I needed to give it a chance to shine.  I think it worked out quite well with this little sketch.


Saturday, December 3, 2011

More Wreaths


This month my stampers club is making wreaths using our gorgeous Christmas papers.  Here are a couple of examples that I'm bringing for inspiration.


This one's not lit very well - sorry!


One More


Ok, I thought I was done with the Christmas cards.  Guess not.  My husband was up at 2:20 this morning to drive down to Kelowna for a course, and naturally, I had a hard time getting back to sleep.  So what did I do?  Went to the happy place (aka - craft room).

I'm having a card buffet with the ladies that I work with this morning, so I have all of their packages made up nicely, ready to go.  I wanted to throw in one more, so here's what came out of my brain this morning.

The first version was with Pear Pizzazz and Early Espresso, but it just wasn't doing it for me.  Crumb Cake and Chocolate Chip fixed that one.  I brayered the CC ink onto the Vintage Wallpaper embossing folder and then ran a piece of Very Vanilla through it.  I've only done this technique with coloured cardstock before, and the result with the thinner Vanilla was quite a bit different.  The coverage isn't quite as uniform, and I think it looks antiquey (pretty sure that's not a word).  Then I layered it all together and punched the ornament through all three layers so you could see through to the inside.  I had a heck of a time finding my Stampamajig, but it finally showed up.  You really need it for this one so that you can line up the ornament stamp on the inside correctly.

I still wasn't totally happy with it at that point, so I gave it a little shimmer spray, and outlined the ornament with glass glitter.  Much better.  This photo doesn't really do the card justice (the lighting here this morning isn't great), but the card is very lovely in person.

Sunday, November 27, 2011


This morning as the snow came down in an almost blizzard-like rate, I sat at my table looking out and decided that I'd finish making my Christmas cards today.  I've been meaning to try making an easel card for quite some time, but hadn't quite gotten around to it.


I ordered myself a package of Holly Berry Suite DSP once I finally realized that I really like it.  It seemed to call to me from the box.  Since I need really nice cards for the parents, I thought this would be the occasion to spend a little more effort on a few cards.

Here it is!  After a little bit of fidgeting trying to get just the right measurements, it turned out really well!  The only thing is, now I want to keep it!  It took me almost an hour from start to finish to make this one, so I hope the recipient likes it as much as I do!


Not Bad for a First Time


This morning and the snow came down in an almost blizzard-like rate, I sat at my table looking out and decided that I'd finish making my Christmas cards today.  I've been meaning to try making an easel card for quite some time, but hadn't quite gotten around to it.


I ordered myself a package of Holly Berry Suite DSP once I finally realized that I really like it.  It seemed to call to me from the box.  Since I need really nice cards for the parents, I thought this would be the occasion to spend a little more effort on a few cards.


Tuesday, November 15, 2011


I seem to be on a kick making things out of scraps.  This is a little silly since I have about 400 full size sheets of paper that I still need to use (and I keep buying more - as though I might run out soon).  I found this card on another SU! demo's website and knew I had to make it.  Check our her blog for a video on how to do the pinwheel.  You're just layering the pieces on top of each other, but I'm too lazy to type it all out when you can read about it on her site.

I wasn't crazy about the plain background of the original card, so I pulled out En Francais (it never fails to impress me with its beauty).  I stamped the entire image with Riding Hood Red, and then took Cherry Cobbler and patted it around a little, finishing with a few pats of Early Espresso.  I love the way the colours blend together and flow like the script.

Paper:  Early Espresso, Riding Hood Red, Very Vanilla, Holly Berry Bouquet, Glimmer paper
Ink:  Early Espresso, Riding Hood Red, Cherry Cobbler
Stamps:  Teeny Tiny Wishes, En Francais
Extras:  Bird punch, Modern label punch, Word Window punch


Monday, November 14, 2011

Please Forgive Me


I know it's only November, but I've got Christmas on my mind.  My past 3 workshops have been full of Christmas cards, and I have my final craft fair of the season coming up next weekend, so there's lots of Christmas crafting going on here at the Langton residence.  I've seen these gifts a million times over the years, but this is the first time I've made them.  I must say, I wish I had done this sooner.  I'm going to bring some to the fair next weekend, but I think I'll make up some more to give out as gifts this year.  Yes, Jen, I will make you one.  (Jen, my very best friend for the past 18 years, sucks at baking.  What better gift?  Just add the wet stuff and bake!)

You could go to town decorating the jar if you wanted to, but I'm pretty happy with just the tag (underneath the paper are the instructions, as well as the ingredients).

Feeling crafty?  Here's the recipe.  It fits perfectly into the 1L canning jars, but you REALLY have to squish the layers down to get it all in.  Make sure you tap the jar on the counter several times once the flour's in to let it settle.  Then once you get the brown sugar in, squish your heart out.  I found a vitamin container that fit in the mouth of the jar to do the main compressing, and then used a spoon to get in the edge.

1st layer:  1 1/3 c flour, 1 tsp baking powder, 1 tsp baking soda, 1/4 tsp salt.  Mix these in a bowl and then pour into jar.  (Don't forget to tap!)

2nd layer: 1 c oats (the nice big fat ones, not the quick type)

3rd layer:  3/4 c m&ms or Smarties

4th layer: 3/4 c chocolate chips (since the m&ms clearly weren't enough)

5th layer:  1/2 c brown sugar (SQUISH SQUISH SQUISH!)

6th layer:  1/2 c white sugar

7th layer:  1/4 c or so pecan pieces

Directions:
 Preheat Oven
to 350 degrees.
Stir dry ingredients in
a large bowl and add:
1/2 cup butter, (almost melted)
1 slightly beaten egg
1 teaspoon vanilla extract
Combine Thoroughly.
Roll into 1 1/2 inch balls &
Bake for 10 minutes.

Hopefully you can just copy and paste those into Word and print them off.  They fit nicely into a Spellbinder die.

VERY IMPORTANT!  When you're buying the m&ms, buy more than what you think you need.  Somehow they seemed to disappear while I was making these jars.  And I ended up with a red tongue.  Weird.

Sunday, November 13, 2011

Photo Gifts

I find that at Christmas I like to give family members a nice photo of me & the fam, but I think giving a frame each year is a little much.  Really, how many framed photos does my best friend want of me?  Here's my solution.


This is a huge clothespin (the photo is a standard 4X6 to give you an idea of scale).  My good friend Modpodge makes an appearance here in adhering and sealing the paper to the peg.  Add a little stamped image and some bling and you're ready to rock and roll.  I found the pegs at a little store in town, and used some scrap paper to cover it up.  Cute, fast, inexpensive, and your friends can change out the picture whenever they want.

ps) The good looking dog in the photo is my dad's German Shepherd, Panzer.  He's about the sweetest dog you'll ever meet.  My so-ugly-you're-cute dog, Lily (she's a boxer), will make an appearance sometime later next week.