Stampin' Up! demonstrator in the Cariboo - serving 100 Mile House and surrounding areas.
Showing posts with label Birthday. Show all posts
Friday, August 29, 2014
Oldie But a Goodie
This morning I was looking through my stash of DSPs and realizing that I have waaaaaaaaaaaay too much paper. I buy a whole package, use 2 or 3 pieces (small pieces of each) then forget about it. As a result of this, I have a whole desktop filing system dedicated to different DSPs. Soooo... How to use up some of the pieces. I've done about 834 quilting cards (which I love to do but I'm bored of). I can't imagine making a card with just DSP and a small sentiment (though I appreciate how lovely these simple cards can be). Herringbone! Yes! Then my smarter side says, "Uh, remember how much cutting is involved?" and I scrap that idea (even though I really really really love those cards...).
Ah ha! Candles! I made a card like this ages ago and then forgot all about it. It's a wonderful way to use up paper and it's cute as all heck.
Next month I'm starting with a brand new group of ladies (yay! It's giving me a major crafting buzz) and I think this will be our paper card for the month (I'm thinking 2 cards with stamping as the main item, 1 card with DSP).
Making the card, though sort of time consuming is really easy. Cut a bunch of 2" X 2" scraps of whatever paper you have lying around. Use a skewer, Q tip, whatever you have that's about that size and round to wrap the paper around and roll away. While the paper is still on the skewer, let it loosen up a little then use some liquid glue to seal the end (I love Tombow Mono glue).
To attach the candles I use my silicone sheet and smear enough hot glue for 2 candles then lie them on the sheet. Add glue for 2 more, and so on until all 9 candles are attached, side by side, to the sheet. You can then lift the piece up (carefully!) and run some more hot glue between pieces so that they stick together (just a little, you don't want it coming through the front). Once that's done, flip it over and press down on the silicone sheet to smooth it all out and let it dry. You've now got one piece that you can peel off and work with. Using your liquid glue again squirt just a little inside the top of your candles so you can add a wick. Since it's quite a bulky piece I use hot glue again to attach it to the card front. Voila! Super cute birthday card good for anyone, big or small, young, old, or geezer.
Wednesday, November 21, 2012
Blooming With Kindness IV
Originally I had made this card with Marina Mist & Black but then Dynamic Duos used those colours this week, and my card wasn't really dolled up enough for my likings when posting for challenges, so I made another version with Wisteria Wonder & Elegant Eggplant. Yet again, Blooming with kindness is the only set I've used for this card. I did however, use the scallop squares die to make the mask. It's a little more interesting than just the plain old square that you can make without a die (which is still pretty, but I wanted something a little more).
This is a card that anyone could make, and took just 10 minutes from start to finish.
Monday, August 13, 2012
Patina Birthday
Last weekend my lovely cousin came down for the day and I showed her how to do a bunch of different techniques. I'd been wanting to try out this fauz patina technique for a while, so this was the perfect time to do so. I loved it! We were super impressed with the lovely gradient of colours, and the embossing powder gave it a lovely vintage feel.
Today is the 18th birthday of one of my best friends and I wanted to make her a nice card but I wasn't really feeling any of the ideas that were swirling around in my head. Then I noticed this panel sitting on my desk still and I started to envision something suited for a young woman of her age. She's not really a kid anymore so I wanted the design of my card to reflect that.
Since I had the panel made already, this card actually only took me about ten minutes to make. I layered it with some distressed Pool Party and then stuck them onto a base of Soft Suede. I love these little rolled roses and the extra dimension they give a card. And of course I needed ribbon. The Victoria Trim was a no-brainer.
I'm looking forward to hearing from my friend tomorrow morning about how a house full of teenagers goes.
Thursday, August 9, 2012
Punch Art
Next week I've got my monthly workshop and I decided to focus on punches. I love to show all the different ways you can use products, and the versatility of punches especially. This one was really fun to make, and super simple to make. I find that I'm always struggling for a design for manly cards, but this certainly fits the bill!
Monday, August 6, 2012
Mosaic Stamping
A while back I posted this entry about mosaic stamping. After I made that card I went in a little binge doing a bunch of cards with emboss reveal and the mosaic. I love the effect it gives you. This weekend, my dear cousin Amber came down and we had a little craft-o-rama on the afternoon. One of the techniques I showed her was how to make this mosaic stamp. It's a great way to use all that left over rubber. If you don't have one of these made already, I suggest you do so. You'll love it!
After a nice jog with a friend this morning followed by a few cups of coffee, I headed out to the room to see what I could come up with. There were bits of rubber all over the place, so I decided to make myself another mosaic stamp. Then of course I had to play with it, so here's what I did. I took my Old Olive, More Mustard, and Pool Party re-inkers and blotted them directly onto the rubber. Then I spritzed my stamp with some Stampin' Mist to make the colours run a bit and to get the ink to space out a bit. I stamped the ink off once on a window sheet so I could squish the stamp down to get the ink to fully cover all of the blocks. Then I misted it again and stamped it onto some Very Vanilla cardstock.
I then decided I wanted some texture, so I ran it through with the Chevron EF before matting. At first I wasn't really sure what I wanted to do with it, but then I had a moment of inspiration and pulled out Daring Adventure. I love the effect it gives since the ink doesn't completely get into the depressed part of the paper. Finally topped it off with a sentiment and voila!
Tuesday, July 10, 2012
Mojo Monday 249 - You're Amazing
What a busy weekend. My dear cousin's step-dad passed away last week so we were busy this weekend with a memorial service for him. Rather than than the traditional cry-your-eyes out type of service (which would not have been his style) we had more pf a party. We decorated the hall with mementos from his life, and shared stories to make everyone laugh. Quite a send off.
Did I mention it's been SWELTERING here lately? All of this was done in a hall that did not have AC, so I've been sweaty and sticky for two days straight.
I'm home today however, and staying in my craft room for the remainder of the day. It's scorching hot outside, but my room is in the garage where it's nice and cool. Even the pets have found their way out here to try and escape the heat.
Today's card uses the Mojo Monday sketch as a base for this birthday card. The elephant and ticket stamp are from You're Amazing. It's a super fun little set that I think I'll get some good mileage out of. The balloon is really neat too, and I thought about using that, but I wanted an image that I could colour. (See following post for a lesson on colouring.) The paper is from Birds of a Feather (also used on another card last week). I'm still a little sad about losing Poppy Parade to make room for the new In Colours this year, but they're certainly growing on me. The base of the card is Summer Starfruit, and the panel base is Raspberry Ripple. That luscious ribbon is the Stitched Satin in Primrose Petals. Island Indigo also makes an appearance on the DSP base.
Saturday, June 30, 2012
Hand Stamped Sentiments #124
Hello Saturday! I have absolutely nothing that needs to get done today, so I stayed up late last night playing in my room. I meant to try out some more of my new goodies, but I saw this sketch on Hand Stamped Semtiments and had an idea for it.
I've done many quilting cards before, and love the extra dimension the embossing gives. Lately I've been on a square card kick (but I hate that I can only get one card out of a regular sized piece of cardstock). Unfortunately, the biggest square card the folders can accommodate is 4.25". So, I used the textures impressions plates (they've retired now - sorry!) to get my quilting done for this one.
Other than size, the difference between the TI plates and the embossing folders is that the EF offer a much deeper, crisper texture. I really prefer the EF, but I wanted to make a nice big card, so that wasn't an option. As you can tell from the picture, the embossing is quite subtle, but it shows much more in person. Overall I'm still really happy with the card. The colours are sure to brighten someone's day!
Wednesday, March 21, 2012
Freshly Made Sketches 27
I am attempting to do three challenges a week. This means that I needed to find challenges for each day of the week, and today Freshly Made Sketches came out with this one.
I like distressing. Change that - love distressing. This week I decided to change things up and try a "clean"challenge. I'm not sure if it really cuts the mustard when it comes to being "clean", but here's my attempt!
Tool Shed is a great masculine set. I've only got two other sets that are manly, but one has a ship on it (not every man is a sailor) and the other one has a plane (less specific, but still...), so I find that I run out of masculine cards to make. This was a good sketch for this set, using it in a different way than I usually do.
I love this combination of colours, and I'd be lying if I said I haven't used it on quite a few man cards.
Saturday, March 17, 2012
A La Card Monkey #100
I've been wanting to make a giant cupcake for sometime now, so when I saw this sketch I knew it was fate! Just looking at this card makes my teeth hurt, thinking of the ooey, gooey icing applied in copious amounts to any respectable cupcake.
I chose a sweet colour scheme to build my card on. Calypso Coral, Blushing Bride, and Chocolate Chip (of course!). The whimsy swirls of Curly Cute seemed the perfect match. Some Vanilla Smooth and Dazzling Diamonds add a little glitz to this sugary number. Now all it needs is a big glass of milk.
Happy 100th sketch Card Monkey!
Thursday, March 15, 2012
Happiest Birthday
It's my favourite Aunt's birthday today. I was on a mission. Continuing on with my love of rolled flowers, I spent ages making this card this morning. I had an idea of what I wanted it to look like, but it certainly took some playing around before I could get it just how I wanted it.
I know there's a lot going on here, but I say - Go Big or Go Home!
Wednesday, March 14, 2012
Trying Something New
So I was out in my new craft room this afternoon (pics coming tomorrow) and I tried out a new technique. Basically I stamped the image in Daffodil Delight and then sponged some Old Olive onto the outer part of the image. Then I used my Night of Navy marker to tap some colour on top of that. I saw this on one of my favourite blogs (Sandi Mac Iver) and wanted to give it a try, however, I could see at once that I wasn't going to like it. I think on a different background I would like it more. She used Parlour Print and it looked amazing. In this image however, it just wasn't quite right, so I sponged it in. I like how it ended up, I just wish that I would have added a little more Navy. Now I know for next time.
And here's my helper, Lily. She traipsed back and forth across the ice patch that used to be our backyard and kept me company while I moved everything over from the house. Tomorrow I'll post a better pic of my space.
Saturday, March 10, 2012
Hand Stamped Sentiments #108
I seem to have a penchant for reading really, really sad books. I just finished Those Who Save Us this morning (by Jenna Blum), and it certainly fell under this genre. It jumps back and forth between a woman forced to endure WWII in Germany, and her daughter in the present. Very well written. Very sad. Worth reading. However, after finishing it I needed something to cheer me up.
I surfed around for a while and then came to the Hand Stamped Sentiments page. Theirs is a colour challenge this week featuring Real Red, Daffodil Delight, Soft Suede, and Crumb Cake. Sounds good to me! I played around for a bit and ended up making a nice little masculine card. I never seem to have a man card on hand when I need one, so this should do quite nicely.
Tuesday, March 6, 2012
Lovely Card for a Lovely Girl
Both my cousin and I love this paper so I knew it had to take centre stage. The flower and Victoria Crochet trip really give it the polished look. I had to play around with the layers before I was completely happy, but I was pleased with the final result.
It's hard to believe that this mini is coming to an end next month. Attic Boutique won't be available after April 30th, so get your orders in while you can!
Sunday, March 4, 2012
Delicate Doilies
I had an awesome workshop this weekend! The ladies were so much fun and made some really beautiful cards. This is one of the cards that I demo'd. I love Delicate Doilies. It's super versatile and can serve any number of purposes depending on the color pallet that you use.
This time I went ultra-girly with Wisteria Wonder, Melon Mambo, Pink Pirouette, and Pretty in Pink. The Basic Grey base gave it some nice punch, and the white embossed image added that extra little bit of detail.
On a totally unrelated note, this gal was on my porch Friday morning! The distance between her and the front door is less than six feet. She was happily munching away on the bag of bird seed that was sitting there. We watched her for about 10 minutes before my dog finally ran outside and barked at her from behind the fence, scaring her, and her friend that was hanging about in the yard, bouncing off across the street into the woods. I was disappointed that she ran off, but she was back a few minutes later finishing her snack.
Saturday, January 7, 2012
Pals Paper Arts 126
Two sketches in one morning? Oh my! After making my first sketch, I decided to poke around a little more before I head off and be responsible and do my housework. The challenge this week at Paper Pals Arts isn't a sketch actually, rather a colour challenge. I used this combo (Baja Breeze, Not Quite Navy, and Very Vanilla) for a few Christmas cards and loved how it turned out. I've been wanting to do this tile technique again for a while and I am currently obsessed with this set (Creative Elements) so here's what came together!
Monday, January 2, 2012
Bring on the Cake!
Christmas is finally over (I love Christmas, but isn't it exhausting?) so I can get back to making other cards. I've cleaned and packed away my holiday sets and spent some time looking through the ones that I've been neglecting for the past few months.
Speaking of Christmas, one of the gifts that I made for my mother-in-law was a box full of cards for every occasion. I told her that throughout the year I would make more and send them down to her. Kind of a perpetual gift.
It seems that I go through a lot of birthday and thank you cards, so I decided that's where I'd start. Her birthday is actually later this month, so I thought I'd better get going.
I love the DSP Just Add Cake. It really has nothing to do with birthdays, but the colour scheme is great. I've made up one masculine, and one more feminine. I always find it hard to come up with manly cards, but I think this one does the trick. It doesn't scream masculine, but I think the colours fit the bill.
The second card could be switched up with a non-pink cupcake and some different ribbon for a less girly version as well.
Monday, July 18, 2011
Man Cards!
I finally got my man stamps today. I'll work on building this part of my collection, but for now these guys will have to do. I'm not really crazy about nautical stuff, but this set is not toooooo shippy (though there is a ship stamp). I have an awesome idea for a colour combo that I could use for this set, but already had Not Quite Navy and Cajun Craze cut and just sitting there, waiting to be used, so I answered their cries. This isn't the layout that I wanted, but I made a total rookie mistake and glued my background on UPSIDE DOWN! Der..... I still like how it turned out though.
I absolutely adore Tool Shed (the big background stamp). I think it will look pretty cool clear embossed too. Maybe I'll try that out once I'm finished this post.... This is a pretty simple card, but I think that's what's great about it. The stamp really stands alone, so why fix a good thing?
Stamps: Uncharted Territory, Tool Shed
Ink: Not Quite Navy, Cajun Craze, Night of Navy
Paper: Not Quite Navy, Cajun Craze, Night of Navy, Sahara Sand
Extras: Hemp Twine, Modern Label Punch, Word Window punch
Friday, July 15, 2011
To Market, To Market
Even if it is cold and miserable, this card makes me pretty happy. I finally got to play with my new triple layer punch and I am IN LOVE! I'm committing tonight to making a few cards with this new little dodad to see what I can come up with. I'm picturing Poppy Parade getting some action, maybe with So Saffron and Concord Crush... Hmmm....
Hope you like it!
Stamps: Teeny Tiny Wishes
Ink: Lucky Limeade
Paper: Lucky Limeade, Baja Breeze, Perfect Plum, Whisper White
Extras: Triple Layer Blossom punch, Perfect Polka Dots EF
Monday, July 11, 2011
Pennant Crazy
I went a little crazy this afternoon. Punch crazy. I wanted to make some cheery cards using the brights collection, so I grabbed my stack of patterned DSP and punched away. I ended up with a pile of pennants covering my desk, and here's what happened. I ended up with 12 cards on some variation of this template. Fun. Fun. Fun. This makes me want cake and ice cream - and a party hat.
Stamps: Pretty Postage, Pennant Parade
Ink: Brights collection
Paper: Brights cardstock collection, Brights patterned DSP
Extras: Petite Pennants punch, Postage Stamp punch, Itty Bitty Shapes punch pack, Perfect Polka Dots embossing folder
Friday, July 8, 2011
Punch Bunch (Workshop)
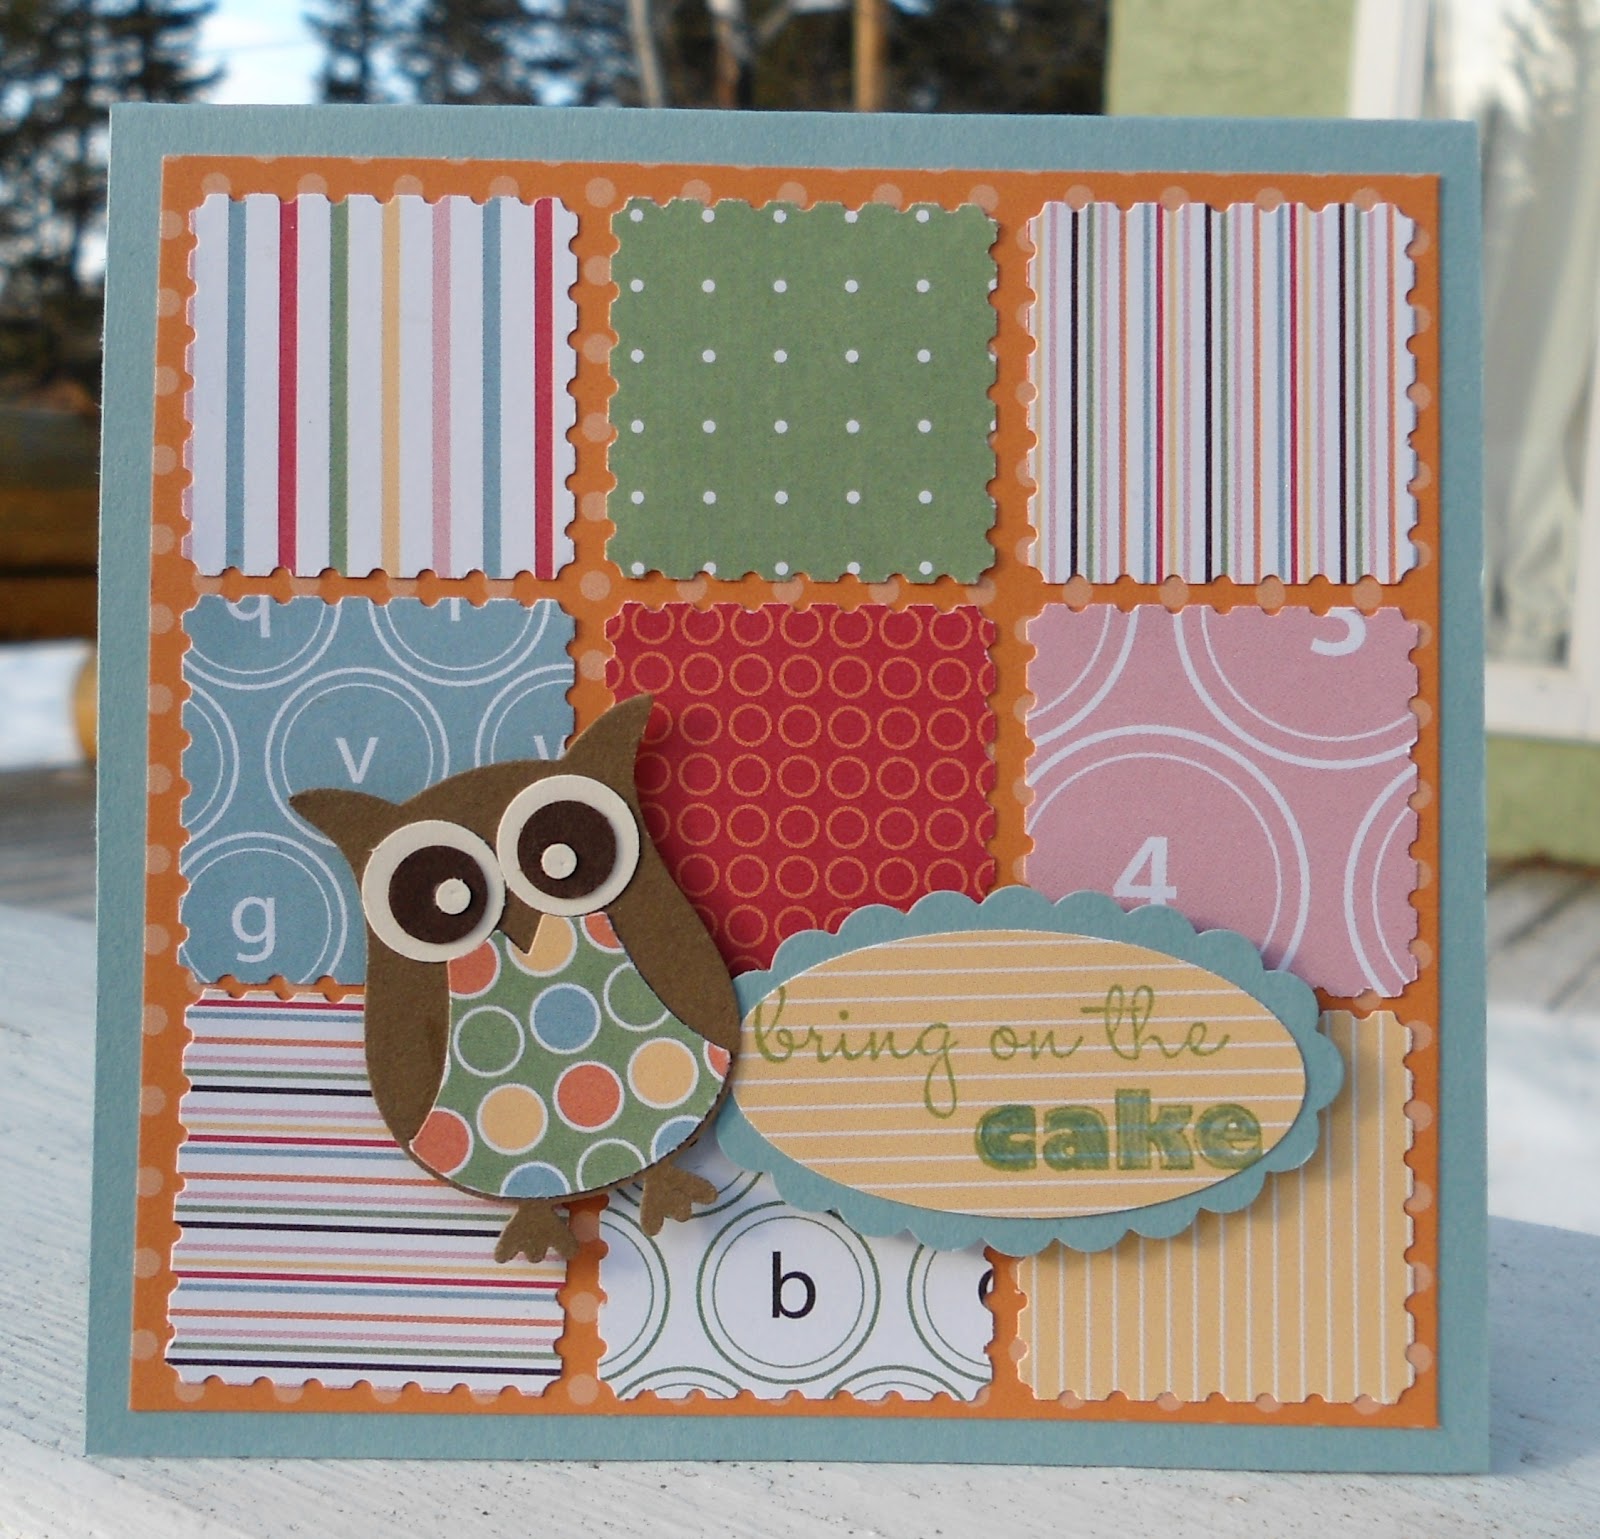
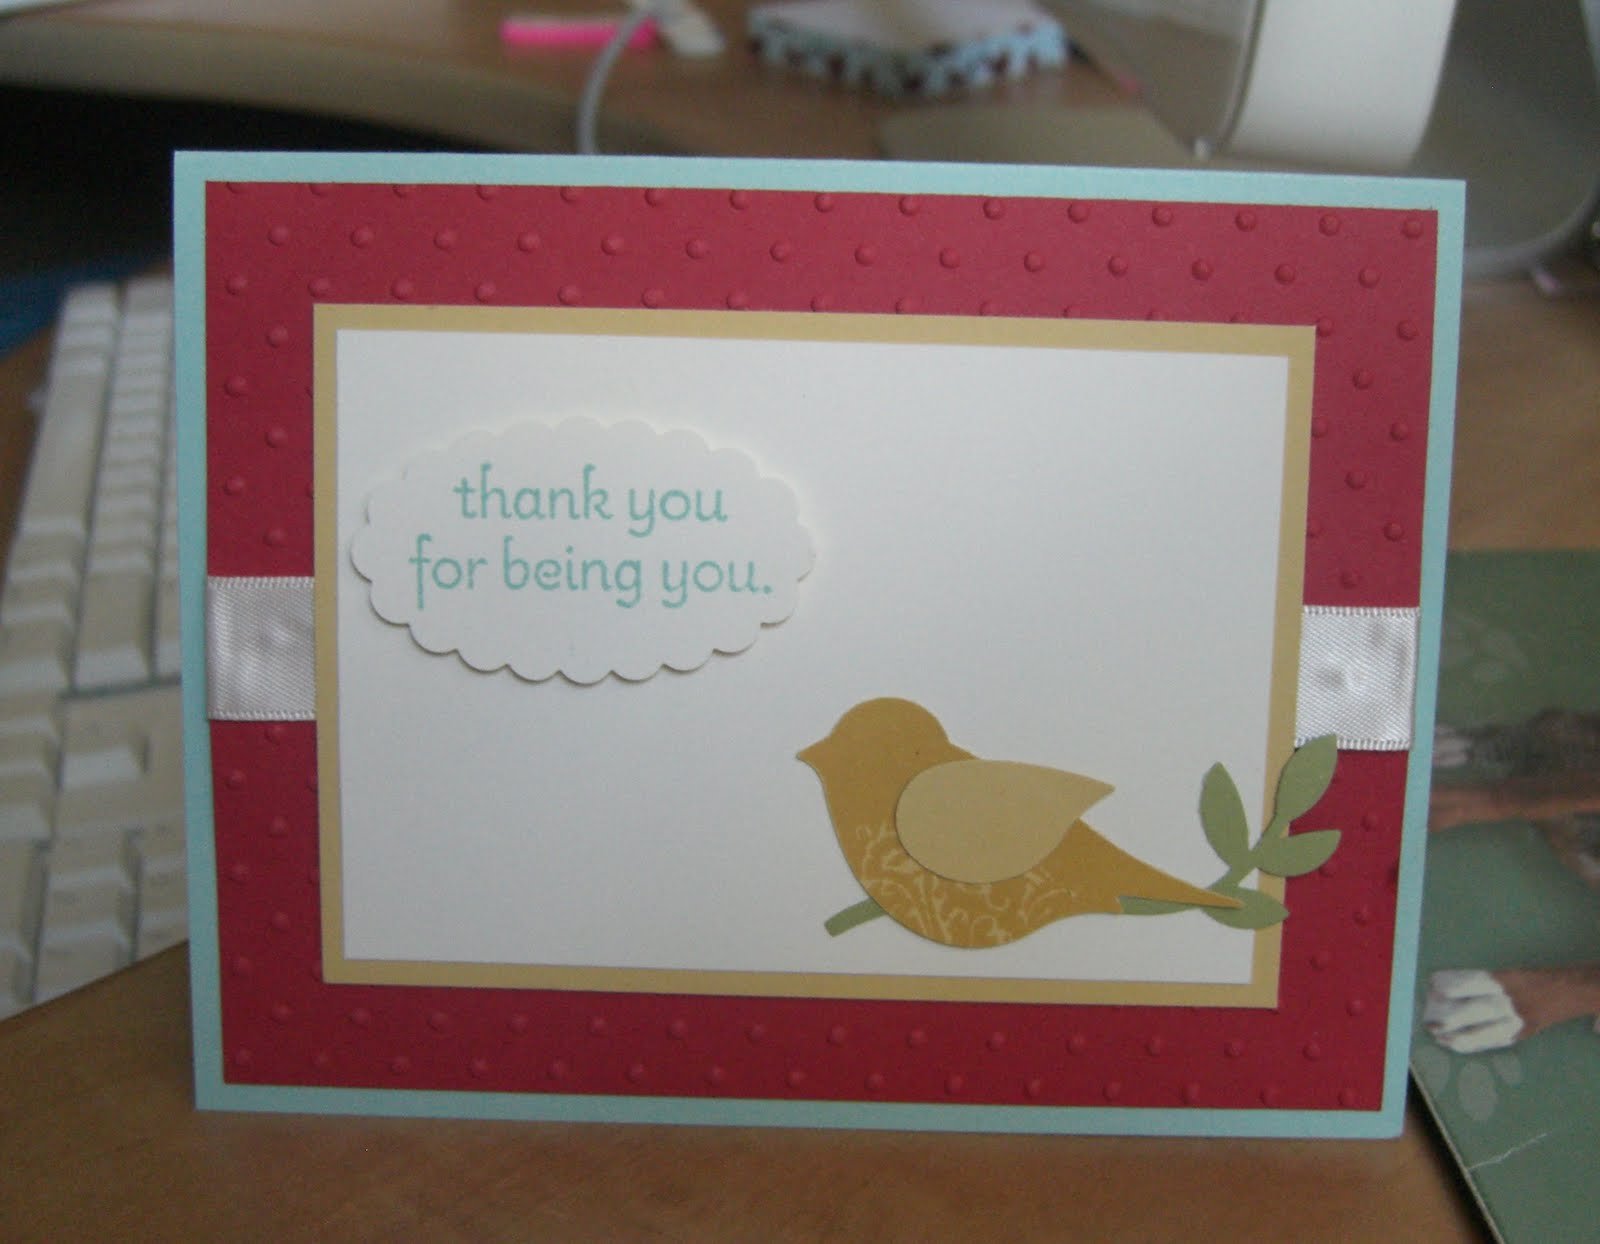
During this workshop you will make three different cards: 1 birthday, 1 thank you, and 1 general occasion (you choose the sentiment). The focus of this workshop is using a few of Stampin' Up's great punches, making a series of fun cards for your stash, ready to give out to your favourite people.
Stamps: Pennant Parade, Bring on the Cake
Ink: Poppy Parade, Bashful Blue
Paper: Poppy Parade, Bashful Blue, Crumb Cake, Very Vanilla
Extras: Petite Pennants Punch
Stamps: Punch Potpourri, Word Play
Ink: Poppy Parade, Bashful Blue
Paper: Poppy Parade, Bashful Blue, Crumb Cake, Very Vanilla
Extras: Butterfly Punch, Crumb Cake seam binding ribbon, Perfect Polka dots embossing folder
Stamps: Curly Cute, A to Z
Ink: Poppy Parade, Bashful Blue
Paper: Poppy Parade, Bashful Blue, Crumb Cake, Very Vanilla, Early Espresso
Extras: Owl Punch, Bird Punch
Stamps: Punch Potpourri, Bold Blossom
Ink: Pool Party, Versamark
Paper: Pool Party, Poppy Parade, So Saffron, Very Vanilla
Extras: Bird Punch, Perfect Polka Dots embossing folder, Scallop Oval Punch
Labels:
A to Z,
Bird Punch,
Birthday,
Bold Blossom,
Bring on the Cake,
Butterfly punch,
Curly Cute,
Oval punch,
Owl Punch,
Pennant Parade,
Petite Pennants punch,
Thank You,
Workshop
Subscribe to:
Posts (Atom)