Monday, February 8, 2016

Back From the Dead


You know what I hate?  When I blog that I really like goes dead.  No warning  No lead-in to allow me to get used to it.  No time to mourn.  In saying that, I really don't know that this blog has anyone that feels even remotely that way, but I was reminded of my blog a few weeks ago by someone who followed it before I dropped into the abyss.  So what happened?  If you care, in 2014 I was finishing a gruelling master's program.  Upon finishing that I basically entered into a bit of a hibernatory state.  I kept making cards but was so freaking drained from school that I didn't have the energy to post again.    That fall my school amalgamated with another and I then had almost 300 kids to  track instead of 150.  That was an adjustment!  And then in 2015 we bought a new (super old) house.  Since June we've been up to our eyeballs in renovations.  In between I have also managed to fit in a bit of traveling (Equador - Galapagos Islands!; Nicaragua; Costa Rica; Mexico).  We're still in the middle of renovations (it currently sounds like I'm in the middle of a construction zone.... Oh.  Wait.  I am.) but I'm ready to come back to the blogging world!


This card is made using a set from the new catalogue.  I.  Love.  It.  Though I can't say that it's going to take the place of Gorgeous Grunge as my favourite, it's going to be a close call.  I started out my making something entirely different, but just wasn't feeling it.  Through a series of small changes I ended up with a completely different card - this little gem.  I'm loving it.  I can see that it would be lovely in a variety of different colour combos...  Might have to try one with Island Indigo next...

So, for anyone that's still around, thanks for reading!


Monday, September 8, 2014

Sponging Like Nobody's Business


I am currently on a sponging binge.  I can't help it.  I love it I love it I love it.  This card is nowhere near what I had in mind when I started, but sometimes when you take a path you didn't know existed, you end up with something awesome.  Other times you end up in the woods with a bear chasing after you, but not this time!


The colours seem a little weird on my screen, but they're Blackberry Bliss, Pacific Point, and Island Indigo.  I started out by sponging the whole 4 1/4 X 5 1/2 sheet and then didn't want to cut it it was so pretty.  The tree is from Festival of Trees, as is the sentiment.  I've been wanting to make a shaped shaker frame for quite some time and this weekend I FINALLY picked up some mounting foam tape, as well as a gigantic jar of glitter (it's something ridiculous like 24oz).  It's just a clear glitter rather than shiny, which is perfect for making it look like a snowdrift!

I already have another card in mind that will incorporate both of these techniques, as well as some trees, so stay tuned!

Friday, September 5, 2014

Hello Fall


WARNING - SPOILER ALERT

Sorry to be the bearer of bad news, but summer is over my friends.  It was 5 degrees here this morning.  Boo.  However, with the return of autumn comes the return of the Pumpkin Spice Latte (yay!) and warm colours in the trees in my yard.


Thankfully, there are just a few tentative yellow leaves at the bottom of my trees, but it felt inspired to make a fall card anyways.  These colours always remind me of my dear cousin, Amber, so here's to you darling girl.


I began by using my brayer to make a layer of Hello Honey on my cardstock (which started out as Whisper White).  I inked it up and rolled it on, not worrying too much about coverage since I knew I'd be layering a little more.  Next, I added random spots of Tangelo Twist, Cajun Craze, and Real Red.  Once I had enough ink to my liking, I sprayed the piece with some alcohol.  This allows the ink to lift and mingle somewhat.  Using my heat tool I dried the ink.  After that I tried spraying it again, but it seems like the alcohol made the ink really sink into the paper.  I actually wanted the inks to run together way more than this, but I love how it turned out.  The spots where the brayer tapped the paper remind me of leaves.  The final ink step was to distress the edges with a little Soft Suede and Baked Brown Sugar.

To add a little dimension I ran it through my Big Shot with a nice embossing folder then matted it on Soft Suede.  I then used the large oval to cut out my sentiment and looped it around the inked layers with some linen twine.  I like the idea of looping the tread under the sentiment as a way to add another layer rather than behind it and using dimensionals to pop it up.  I didn't want a layer of colour behind the sentiment so this jazzes it up enough to allow me to get away without it.

I love love love this card, but I'm going to keep playing with spraying and inking until I figured out what it was I was trying for.


Friday, August 29, 2014

Oldie But a Goodie


This morning I was looking through my stash of DSPs and realizing that I have waaaaaaaaaaaay too much paper.  I buy a whole package, use 2 or 3 pieces (small pieces of each) then forget about it.  As a result of this, I have a whole desktop filing system dedicated to different DSPs.  Soooo...  How to use up some of the pieces.  I've done about 834 quilting cards (which I love to do but I'm bored of).  I can't imagine making a card with just DSP and a small sentiment (though I appreciate how lovely these simple cards can be).  Herringbone!  Yes!  Then my smarter side says, "Uh, remember how much cutting is involved?" and I scrap that idea (even though I really really really love those cards...).

Ah ha!  Candles!  I made a card like this ages ago and then forgot all about it.  It's a wonderful way to use up paper and it's cute as all heck.


Next month I'm starting with a brand new group of ladies (yay!  It's giving me a major crafting buzz) and I think this will be our paper card for the month (I'm thinking 2 cards with stamping as the main item, 1 card with DSP).

Making the card, though sort of time consuming is really easy.  Cut a bunch of 2" X 2" scraps of whatever paper you have lying around.  Use a skewer, Q tip, whatever you have that's about that size and round to wrap the paper around and roll away.  While the paper is still on the skewer, let it loosen up a little then use some liquid glue to seal the end (I love Tombow Mono glue).

To attach the candles I use my silicone sheet and smear enough hot glue for 2 candles then lie them on the sheet.  Add glue for 2 more, and so on until all 9 candles are attached, side by side, to the sheet.  You can then lift the piece up (carefully!) and run some more hot glue between pieces so that they stick together (just a little, you don't want it coming through the front).  Once that's done, flip it over and press down on the silicone sheet to smooth it all out and let it dry.  You've now got one piece that you can peel off and work with.  Using your liquid glue again squirt just a little inside the top of your candles so you can add a wick.  Since it's quite a bulky piece I use hot glue again to attach it to the card front.  Voila!  Super cute birthday card good for anyone, big or small, young, old, or geezer.


Thursday, August 28, 2014

Snowy Backdrop


You know that feeling when you see a card you love but you don't have the supplies to make it?  Well, if you live in the city, no problem.  However, if you're a little country bird like myself, you make do with what you've got on hand.

I saw an amazing background that looked like a galaxy with all sorts of cool stuff that I don't have (embossing paste, Perfect Pearls, star stencils...).  I was determined to make a snowy background in the same fashion, so I set out rummaging through my stuff to see what I could find.

I sponged the background with Coastal Cabana and Lost Lagoon and was pretty happy with that as a base.  To get the snow, I used some pearly metallic acrylic paint I had on hand and mixed it with rubbing alcohol.  This made it nice and runny so I was able to pick it up with a paint brush. I then flicked my brush towards the page to get the misty look but the blobs weren't big enough for what I wanted so I just used the tip of the brush to add a few bigger dots on.  Turned out pretty well!


 After that dried I used some Staz On to stamp my image (and extended the trunks a little with a marker) from the new set Festival of Trees.  I usually centre everything on my cards but wanted to try something new this time and I'm really happy with the result.  The embossing folder is an old one but I just couldn't get rid of it.  Since there isn't a whole lot of the mat showing I wanted something on a small scale and this one was perfect.  Petals a Plenty would have worked as well, but I wanted to keep the snowflake theme going.


And what would a Christmas card be without a little ribbon?  This is the Lost Lagoon ribbon you can find in the Holiday Catalogue.  I layered a piece of white satin behind it so the ribbon stood out more than it would have on the monochromatic background.  Overall, I'm loving this card.  It could grace the homes of quite a few family members this December!

Wednesday, August 27, 2014

Traveling With Van Gogh


On Sunday I was dutifully drinking my coffee and looking up crafty stuff on the interwebs when I found a really beautiful card.   Like out-of-this-world beautiful (said card can be found here).  I was super blown away and wanted to make it immediately, but I don't have that stamp.  I started thinking about how nice it would look as a water scene...  maybe a sunsent...  ooh!  A boat on the ocean with a huge moon!  That's it!  Feeling rather pleased with myself with this stroke of genius, I plastered a smarmy grin on my face thinking about how impressive my card would be, I kept scrolling through her blog.  Hmph.  Seems she had the same genius idea that I did.  So, with some of the wind blown out of my sails (insert groan at corny joke here if you please), I finished looking and got to work.


As much as I was bummed that this ended up not being entirely my own idea, I was thankful to have seen hers since I wouldn't have thought to do the reflection in this way.  The card isn't perfect, and I'll need a few more shots to get it exactly how I want it, but it's still pretty awesome.

For anyone interested, I sponged the background to get it to reflect the colours I wanted; moon was So Saffron, Daffodil Delight, and Hello Honey; sky is Soft Sky, Marina Mist, Night of Navy; sea is Pool Party and Lost Lagoon.  For the squiggles reminiscent of Van Gogh I used the same markers but threw More Mustard into the mix on the moon.  Though the whole process didn't take as long as I thought it would, looking back at the card I was inspired by, I could have made my squiggles waaaaay bigger than I did.  I might try it again and see which size I like better.

Super excited for my hostess club ladies to see this!  I was thinking about surprising them at club with it, but it's too good not to share and I can't possibly hold off on it for another three weeks.

Happy Stamping!

Tuesday, August 19, 2014

Seize the Sketch & Funky Berries


Ok, so the first bit here is going to be about the card, the rest is about my hostess club last night.  Feel free to skip all of that if you don’t like hilarious/charming stories (however, you and I will secretly know what a killjoy you are if you do).

So since I’ve been back at making cards, I have stumbled upon Seize the Sketch.  I love their sketches and look forward to the challenges even if I don’t post them.  Imagine my sadness to rise this morning and find she’s moving on to other things (I hope your new adventure takes you wonderful places Jen-I-have-never-met!).  Anywho, since this is her last sketch I thought I’d hurry into my room before getting going on my should-dos for the day.


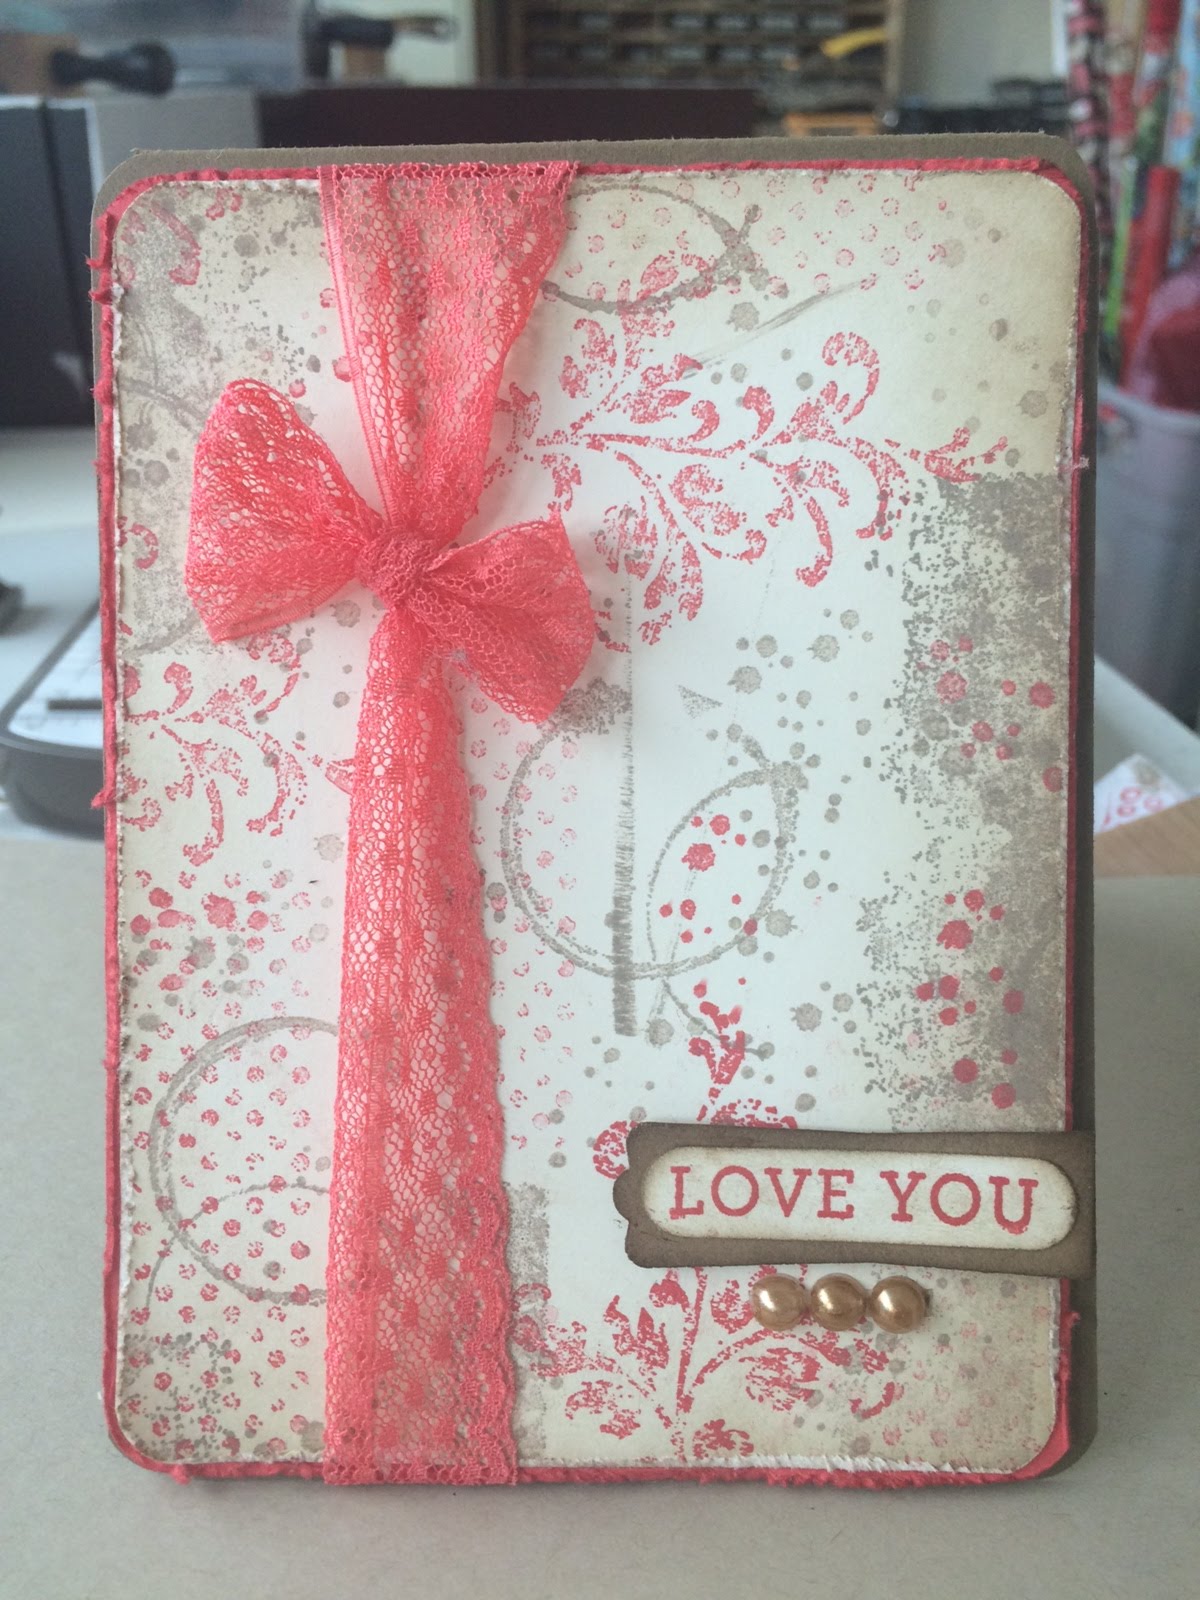
As soon as I saw the sketch I knew exactly what sets and colours I wanted.  I love when that happens (sometimes I sit and stare at my stuff for like half an hour before finally agreeing (with myself) on what to use.


Sponging/masking are two of my favourite things to do and this little set is pretty darn sweet.


Alright – enough card talk.  Onto the hilarity.  I know that all of you demonstrators (or whatever your company calls you) think your hostess club is the best, but I must inform you that you are wrong (feel free to fight amongst yourselves for who can take second place).  My club wins.  We started out maybe 3 years ago and have morphed a little with members but a few have been with me for the long haul and though they’re still my club ladies, they have also become dear friends.  I love the crafting part of our nights, but also always look forward to visiting and chatting.

One of my members (Misty) has three small people, and if you also have small people you know what HIGHWAY ROBBERY hiring a babysitter is.  She lives 35 minutes away, and we usually take about 4 hours or so at $8/hour, you can imagine how quickly that gets expensive.  All of us have kids at varying ages and I adore her little gremlins so she brought them over.  One of the other gals (Shannon) brought her a huge box of Kinex from when her kids were small and it was a hit.  So while we were making cards they played away in the living room nicely and left us to be creative.

After sometime they came in to update us on the progress of their creations.  At one point, the smallest person, Gavy, came in and offered Caren one of the berries the kids brought.  Sometimes Gavy is super shy so we were all paying great attention to him last night since he seemed in the mood for socializing, so when he offered Caren the berries we were all listening.  There’s Caren, eating the berries when Gavy says, “If it tastes funky, spit it out.  It’s probably poisonous.”

Oh.  My.  Lord.  All six of us lost it.  Snorting, crying, gasping for breath.  This went on for several minutes before we could get out you-know-what together.  I’m laughing right now just thinking about it.  They were Saskatoon berries, so we knew she’d be just fine, but it was just about the funniest thing you can possibly imagine.

Anyways, that had nothing to do with the card I posted but couldn’t help but share.   

Cheers to funky tasting berries!